How to Kill Grass: 11 Methods That Actually Work (2026 Guide)


A green lawn looks great until it becomes a constant battle: patchy turf, weeds, brown spots, and rising water bills. In San Diego, where the average household spends $80 to $150+ per month irrigating a natural lawn during summer, more homeowners are making the decision to kill the grass and start over with a low-water alternative.
Whether you are replacing your lawn with artificial turf, drought-tolerant landscaping, pavers, or a full outdoor living remodel, step one is the same: kill the existing grass completely so the new surface starts on clean ground.
This guide covers 11 methods to kill grass, ranked and organized by natural vs. non-natural approaches. Each method includes realistic timelines, what it actually costs, and the specific situations where it works best. If your end goal is a premium replacement (turf, hardscape, or a full outdoor living build), scroll to After the Grass is Dead: What to Build Next.
Educational only (not legal advice). For any herbicide, follow the manufacturer label and safety requirements. Keep children and pets away during application and drying.
- Fastest full-lawn method: A non-selective herbicide applied per label directions (typically 10 to 14 days for full die-off).
- Best natural method for large areas: Solarization using clear plastic sheeting (4 to 8 weeks, especially effective in San Diego’s 260+ sunny days per year).
- Best for small patches: Shovel removal (immediate), boiling water (1 to 3 days), or vinegar spot treatment (1 to 3 days).
- Methods to avoid if you plan to replant or install landscaping: Salt and bleach, which damage soil biology and can affect surrounding areas through runoff.
Before You Kill Grass: 5-Minute Prep Checklist
Before you pour, spray, or dig, take five minutes to avoid the mistakes that turn a simple lawn removal into an expensive problem.
- Decide what you are building next: Artificial turf, pavers, drought-tolerant planting, or a full outdoor living remodel. The replacement plan determines which grass-killing method makes sense. If you are installing turf, the grass needs to be fully dead and removed. If you are laying pavers, the grass and topsoil will be excavated anyway, so the killing method matters less.
- Locate irrigation lines and valves: Flag all sprinkler heads, valve boxes, and any shallow irrigation lines before you dig or apply heat. In San Diego, most residential systems use shallow PVC lines that a shovel or sod cutter can easily damage.
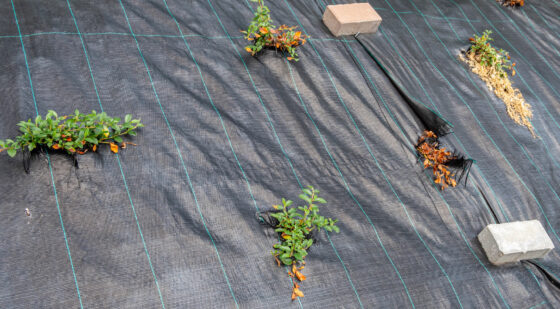
- Protect what stays: Vinegar, salt, boiling water, and herbicides are all indiscriminate. If you have plantings, trees, or ground cover adjacent to the lawn that you want to keep, plan your application to avoid drift and runoff. Use physical barriers (cardboard, plastic sheeting) at the edges if needed.
- Check the weather: Avoid spraying anything on windy days (drift will carry chemicals or vinegar onto plants you want to keep). Avoid applying herbicides, salt, or baking soda immediately before rain, which will dilute and spread them beyond the target area.
- Plan disposal: If you are physically removing sod, a typical San Diego lawn generates 200 to 500+ pounds of material per 500 square feet. Know where it is going: haul to the landfill, compost on-site, or schedule green waste pickup.
All 11 Methods at a Glance
This table gives you the quick comparison. Detailed instructions for each method follow below.
| Method | Natural? | Time to Kill | Best For | Main Caution |
|---|---|---|---|---|
| 1. Shovel removal | Yes | Immediate | Small to medium areas, total removal | Labor intensive; locate irrigation first |
| 2. Solarization | Yes | 4 to 8 weeks | Large lawns, patient homeowners | Requires clear plastic + sustained sun |
| 3. Layering | Yes | 4 to 8 weeks | Large areas, conversion to planting beds | Needs enough cardboard/newspaper |
| 4. Mulching | Yes | 4 to 6 weeks | Medium areas | Must be 4+ inches thick or it feeds the lawn |
| 5. Vinegar | Yes | 1 to 3 days (foliage only) | Spot kills, small patches | Does not kill roots; avoid wanted plants |
| 6. Boiling water | Yes | 3 to 7 days | Tiny targeted areas | Burn risk; impractical for large areas |
| 7. Baking soda | Yes | 1 to 2 weeks | Small targeted patches | Raises soil salinity; watch runoff |
| 8. Salt | Yes (but damaging) | 1 to 2 weeks | Areas you never want to regrow | Permanent soil damage; runoff risk |
| 9. Herbicide | No | 10 to 14 days | Fastest full-lawn kill | Follow label exactly; prevent drift |
| 10. Bleach | No (not recommended) | 1 to 2 weeks | Generally avoid | Soil damage; safety hazard |
| 11. Dish soap mix | Mixed | 1 to 2 weeks | Small patches only | Inconsistent results |
How to Kill Grass Naturally (Methods 1 through 8)
1. Shovel Removal (Manual Sod Stripping)
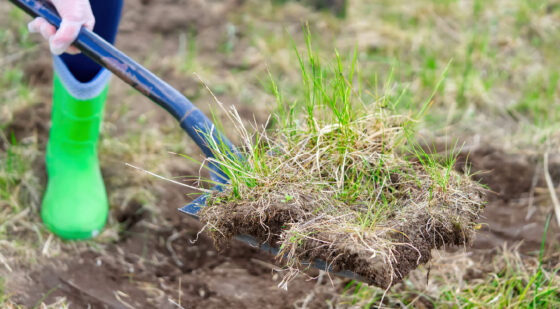
How it works: Stop watering your lawn for 1 to 2 weeks so the soil firms up and the grass weakens. Using a flat-edged shovel or a manual sod cutter, slice the turf into manageable strips (about 12 to 18 inches wide), cutting 2 to 3 inches below the surface to get under the root mat. Roll or fold each strip and stack for disposal.
Why it works: This is the only method that physically removes both the grass and its root system in one step. There is nothing left to regrow. For homeowners who are installing artificial turf or pavers afterward, shovel removal also begins the excavation process that those installations require anyway.
Practical reality: This is hard physical labor. A 500 square foot lawn generates 200 to 500+ pounds of sod. For larger lawns, renting a gas-powered sod cutter ($75 to $150 per day from most equipment rental shops) makes the job dramatically faster. Before you dig, walk the lawn and flag every sprinkler head, valve box, and any visible irrigation lines. Shallow PVC lines are easy to slice through with a shovel and expensive to repair.
Best for: Small to medium lawns (under 1,000 square feet) where you want immediate results and plan to install a new surface soon. Also the right choice when the lawn is heavily infested with weeds or invasive grasses (like Bermuda grass, which is extremely common in San Diego) that will survive chemical treatments and regrow from remaining root fragments.
2. Solarization (Clear Plastic Heat Treatment)
How it works: Mow the lawn as short as possible, water it lightly, then cover the entire area with clear plastic sheeting (2 to 4 mil thickness works best). Anchor the edges with rocks, bricks, or landscape staples so wind cannot lift the plastic. The clear plastic creates a greenhouse effect: sunlight passes through, heats the soil, and the trapped heat builds to temperatures of 140 to 160 degrees Fahrenheit. At those temperatures, grass, weed seeds, and many soil-borne pathogens are killed.
Why San Diego is ideal for solarization: This method depends on sustained direct sunlight, and San Diego averages 260+ sunny days per year. During summer months (June through September), solarization can kill a full lawn in 4 to 6 weeks. In winter or on north-facing yards with partial shade, it can take 8+ weeks or may not reach lethal temperatures at all. Timing matters: start in June or July for the fastest results.
Important detail most guides skip: Use clear plastic, not black plastic. Clear plastic allows sunlight to penetrate and heat the soil to higher temperatures. Black plastic blocks light and kills grass through light deprivation (much slower), but does not achieve the soil temperatures needed to kill weed seeds and Bermuda grass rhizomes below the surface.
Best for: Large lawns (1,000+ square feet) where you have 4 to 8 weeks of lead time before your replacement project starts. The most cost-effective method for big areas because clear plastic sheeting costs $20 to $50 for a roll that covers 500+ square feet.
3. Layering (Cardboard or Newspaper Smothering)

How it works: Mow the lawn short, then cover the entire area with overlapping layers of cardboard (single or double layer, with all tape and labels removed) or 8 to 10 sheets of newspaper. Wet the material thoroughly so it conforms to the ground and does not blow away, then cover with 3 to 4 inches of mulch or compost. The cardboard blocks all light and slowly decomposes, smothering the grass below.
Timeline: 4 to 8 weeks for full die-off. The cardboard and grass both decompose, adding organic matter to the soil beneath. This makes layering the best grass-killing method if you plan to plant directly into the same soil afterward (drought-tolerant landscaping, native plants, garden beds).
Limitation: Layering is not the right choice if you plan to install artificial turf or pavers afterward, because both require excavation of the topsoil anyway. It is specifically suited for planting-based replacements where healthy soil is an asset.
Best for: Homeowners converting a lawn to drought-tolerant planting beds, native gardens, or xeriscape. The decomposed cardboard and mulch create an enriched planting surface at no extra cost.
4. Heavy Mulch Smothering
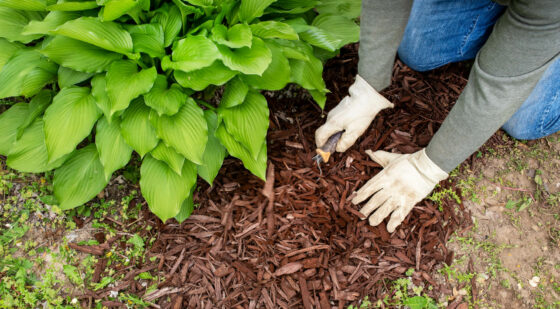
How it works: Apply a thick layer (4 to 6 inches minimum) of wood chip mulch, bark, or compost directly over the existing lawn. The weight and light deprivation smother the grass over 4 to 6 weeks.
Critical detail: The layer must be thick enough. A 2-inch mulch layer will not smother established grass. It will actually insulate the soil, retain moisture, and help the grass grow better. You need a minimum of 4 inches, and 6 inches is more reliable. For aggressive grasses like Bermuda, combine mulching with a cardboard layer underneath (method 3) for the best results.
Best for: Medium-sized areas where you want to transition to a mulched landscape bed. Free or low-cost wood chips are often available from local tree services (check ChipDrop or call arborists in your area).
5. Vinegar (Spot Treatment Only)
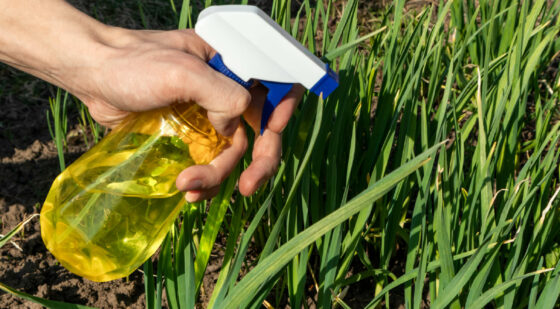
How it works: Spray vinegar directly onto grass blades. The acetic acid strips the waxy coating on the leaves, causing them to dehydrate and die. Household vinegar (5% acetic acid) works on young, tender growth. Horticultural vinegar (20% acetic acid) is significantly stronger and kills mature grass foliage more reliably.
The honest limitation: Vinegar kills foliage but does not kill roots. For shallow-rooted grasses, a few applications may be enough. For deep-rooted or rhizomatous grasses (Bermuda grass, St. Augustine), the grass will regrow from the roots after the visible foliage dies. You will need repeated applications or a different method.
Safety note: 20% horticultural vinegar is a serious irritant. Wear eye protection and gloves. It can also etch concrete, pavers, and natural stone on contact, so spray carefully and avoid overspray onto hardscape surfaces.
Adding a teaspoon of dish soap per cup of vinegar helps the solution adhere to grass blades and increases effectiveness. Apply on a dry, sunny day for the fastest results.
Best for: Killing small patches of grass or weeds in isolated areas (along fence lines, in cracks, between stepping stones). Not practical or effective for killing an entire lawn.
6. Boiling Water

How it works: Pour boiling water directly onto the grass you want to kill. The thermal shock ruptures plant cell walls, killing the foliage and shallow roots on contact. Multiple applications over several days may be needed to kill deeper root systems.
Practical reality: This method is effective but extremely labor-intensive for anything larger than a few square feet. Carrying boiling water from the stove to the yard is slow and carries a burn risk. For small, targeted areas (a patch of grass growing through a paver joint, a strip along a fence), it is one of the best options available because it is instant, free, and leaves no chemical residue.
For more on killing weeds in hardscape joints specifically, see our guide to removing weeds between pavers.
Best for: Tiny targeted areas where you want an immediate, chemical-free kill. Not practical for lawns.
7. Baking Soda
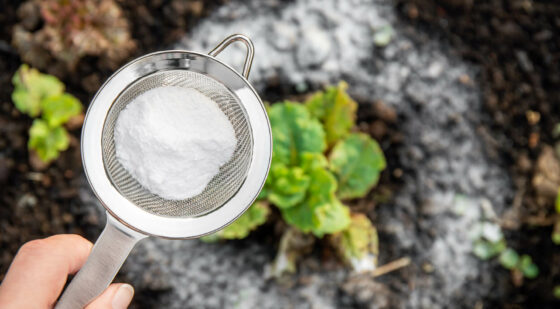
How it works: Sprinkling baking soda (sodium bicarbonate) directly onto grass raises the soil’s sodium content and pH, creating conditions hostile to plant growth. The grass desiccates and dies over 1 to 2 weeks.
Caution: Like salt, baking soda is indiscriminate and can be carried to other areas by irrigation or rainfall. It raises soil salinity, which can make the treated area hostile to future plantings. Use only in areas where you do not plan to grow anything (gravel paths, under decks, along building foundations) or where you plan to excavate the topsoil anyway.
Best for: Small targeted patches in areas where future plant growth is not a concern.
8. Salt (Use With Extreme Caution)
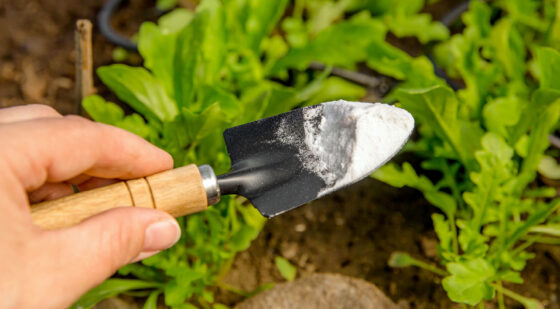
How it works: Salt kills plants by drawing moisture out of their cells through osmosis. Sprinkling rock salt or table salt directly onto grass will kill it within 1 to 2 weeks.
Why we do not recommend it: Salt does not stay where you put it. Rain and irrigation dissolve the salt and carry it into surrounding soil, where it accumulates and creates long-term damage. Heavily salted soil can remain hostile to plant growth for years. In San Diego, where drought-tolerant landscaping depends on healthy soil biology, introducing salt contamination is a particularly bad trade.
Salt can also corrode metal landscape edging, damage concrete and paver surfaces through efflorescence (white crystalline deposits), and leach into neighboring properties through subsurface water movement.
If you must use salt: Limit it to isolated hardscape areas (gravel driveways, between flagstones) that are far from any soil you want to use for planting. Even then, use the minimum amount necessary.
Non-Natural Methods (Methods 9 through 11)
9. Non-Selective Herbicide (Fastest Full-Lawn Kill)

How it works: Non-selective herbicides (the most common active ingredient is glyphosate) are absorbed through the leaves and transported to the root system, killing the entire plant from the inside. Most products produce visible yellowing within 3 to 5 days and full die-off within 10 to 14 days.
When this is the right choice: If you have a large lawn (1,000+ square feet) and need it dead within 2 weeks to meet a construction timeline, a non-selective herbicide is the fastest and most reliable option. This is the method most professional landscapers use before lawn replacement projects because it kills grass and roots completely in a predictable timeframe.
How to apply it properly: Apply on a calm, dry day with no rain forecast for at least 24 hours. Use a pump sprayer for even coverage. Follow the manufacturer’s dilution ratio exactly (more is not better and can actually reduce effectiveness by killing the leaves before the chemical reaches the roots). Keep children and pets off the treated area until it has dried completely. A second application 10 to 14 days later may be needed for persistent grasses like Bermuda.
Important note on Bermuda grass: Bermuda grass is the most common lawn grass in San Diego and one of the hardest to kill. It spreads through both surface runners (stolons) and underground stems (rhizomes). A single herbicide application will often kill the visible grass but leave rhizomes alive underground, producing regrowth within weeks. Two applications spaced 14 days apart are typically needed for complete Bermuda grass eradication.
10. Bleach (Not Recommended)
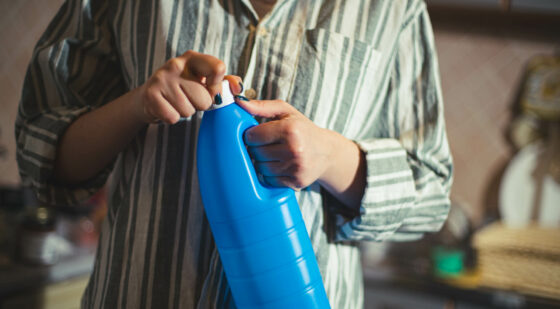
Bleach (sodium hypochlorite) will kill grass, but it also kills beneficial soil organisms, can contaminate groundwater, and creates a toxic environment that makes future planting difficult. It is also a health hazard: bleach fumes in an enclosed outdoor area (next to a wall or fence) can cause respiratory irritation, and it should never be mixed with other household chemicals.
Our recommendation: There is no situation where bleach is the best choice. Every outcome bleach achieves can be achieved more safely and effectively by another method on this list. If you want fast results, use a commercial herbicide. If you want natural, use solarization or manual removal.
11. Dish Soap DIY Mix
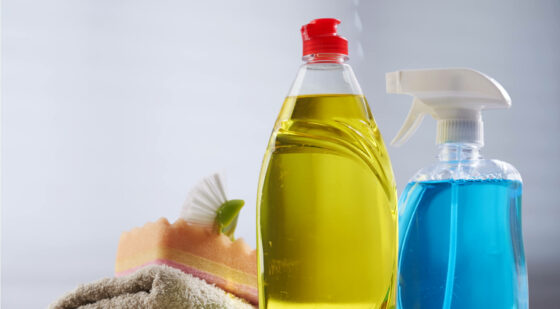
A common DIY recipe combines vinegar, salt, and dish soap into a spray-on solution. The vinegar strips the leaf coating, the salt dehydrates the plant, and the dish soap helps the mixture adhere. Results vary widely depending on grass type, concentration, and application method.
This mixture carries the same cautions as vinegar and salt individually: it does not reliably kill roots, it can damage soil, and runoff can affect surrounding plants. It works best as a spot treatment on small patches and should not be relied on for full lawn removal.
After the Grass is Dead: What to Build Next
Killing the grass is the easy part. What you build next is where most projects succeed or fail. The biggest mistake homeowners make is replacing the surface without addressing what is underneath: grading, drainage, and edge definition.
A new layer of artificial turf installed on the same failed grade and soil as the old lawn will develop the same drainage problems the old lawn had, plus new ones (turf does not absorb water the way grass roots do). Pavers installed without proper base excavation will settle and rut within the first year. The replacement material matters, but the prep work matters more.
The Most Common Lawn Replacements in San Diego
Artificial turf: The most popular lawn replacement in San Diego. A properly installed turf system includes full excavation of the old lawn and topsoil, a compacted base (typically 3 to 4 inches of decomposed granite or Class II road base), weed barrier fabric, the turf itself, and infill. Installed cost in San Diego ranges from $8 to $15+ per square foot depending on turf quality, base depth, and drainage complexity. Use our Artificial Grass Cost Calculator for a quick estimate, or read the full 2026 Artificial Grass Cost Guide.
Paver patio or hardscape: Many homeowners replace a front or back lawn with a paver surface that creates usable outdoor living space (dining area, fire pit zone, outdoor kitchen pad). This requires full excavation, 8 to 12 inches of compacted base rock, bedding sand, and the paver surface. Installed cost: $20 to $35+ per square foot. See our Paver Cost Guide or Paver Cost Calculator.
Drought-tolerant landscaping: Native plants, succulents, decomposed granite pathways, and drip irrigation. This option preserves more natural ground cover, requires less excavation, and qualifies for water authority rebate programs. The San Diego County Water Authority has historically offered rebates of $2 to $4 per square foot for qualified turf replacement projects (check current program availability as funding fluctuates).
Full outdoor living remodel: The most comprehensive approach combines turf, pavers, outdoor kitchen, shade structure, fire feature, lighting, and landscaping into a cohesive design-build project. In San Diego, typical backyard remodels range from $85,000 to $190,000+. Full property (front and back) projects range from $180,000 to $600,000+ depending on property size, slope, and finishes. For a complete budgeting breakdown, read our 2026 Outdoor Living Cost Guide.
- Drainage first: Establish slope, install drains, and plan a lawful discharge path before any surface goes down.
- Edges next: Curb, soldier course, or aluminum edge restraint so turf stays tight and hardscape stays defined.
- Hardscape integration: A real patio zone with defined use areas outperforms a big rectangle of turf every time.
- Future-proofing: Run conduit sleeves under hardscape for lighting, audio, and irrigation upgrades before the surface is sealed.
Get a Lawn Replacement Plan & Estimate |
Use the Turf Cost Calculator |
Frequently Asked Questions
We design and build lawn replacements, artificial turf installations, paver hardscapes, and full outdoor living projects across San Diego County, including Rancho Santa Fe, Del Mar, La Jolla, Carmel Valley, Encinitas, Carlsbad, Poway, Escondido, El Cajon, Santee, Scripps Ranch, Oceanside, San Marcos, Chula Vista, Coronado, Bonita, Fallbrook, and the surrounding coastal and inland communities.