From the Front Door to the Pergola, One Paver
This finished project was a $22.5k-$25k build.
Project Gallery
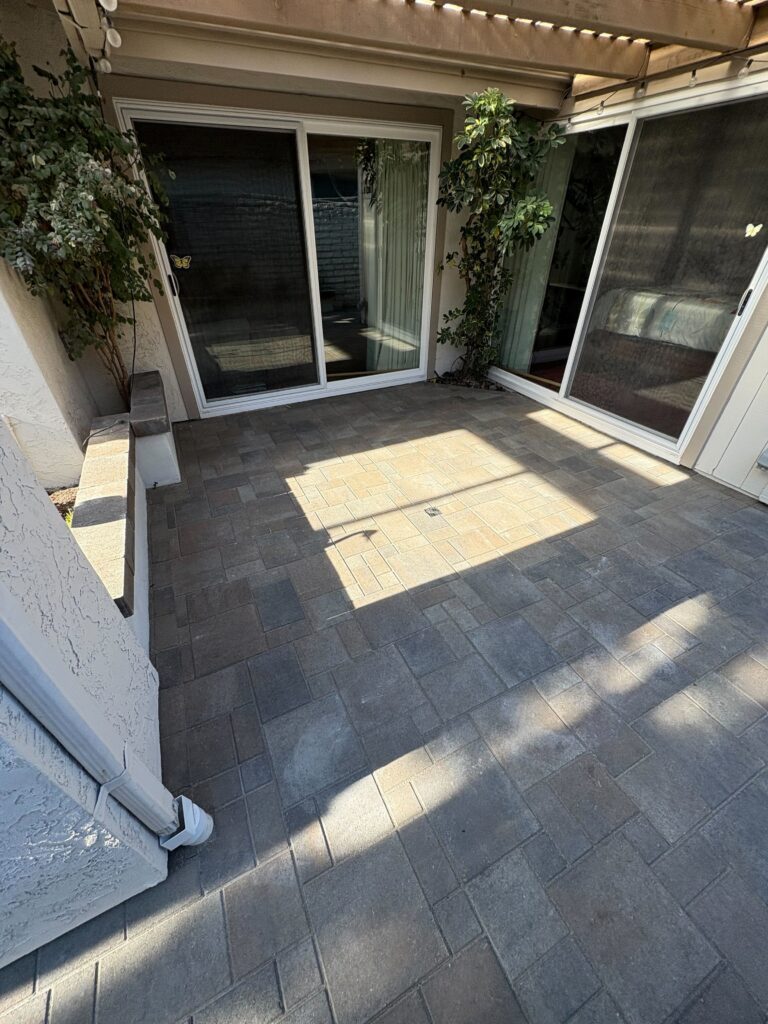
The back patio under the pergola — paver field, central floor drain, sliding-door threshold.
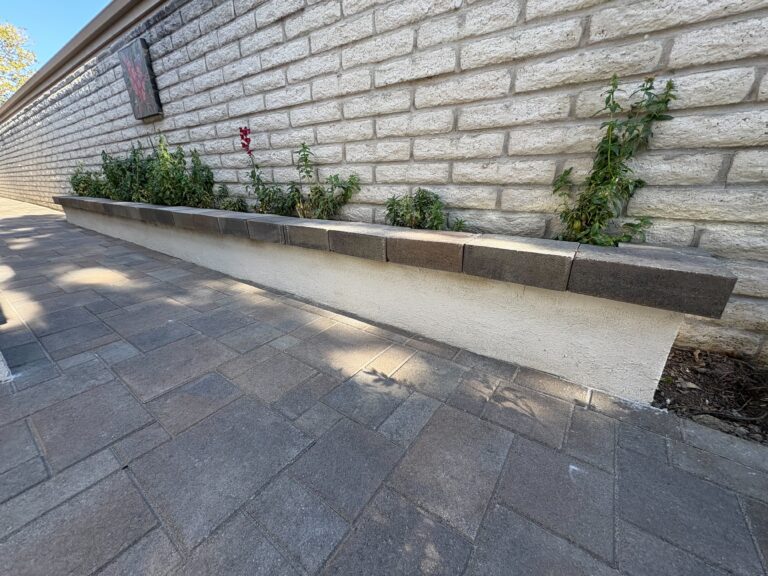
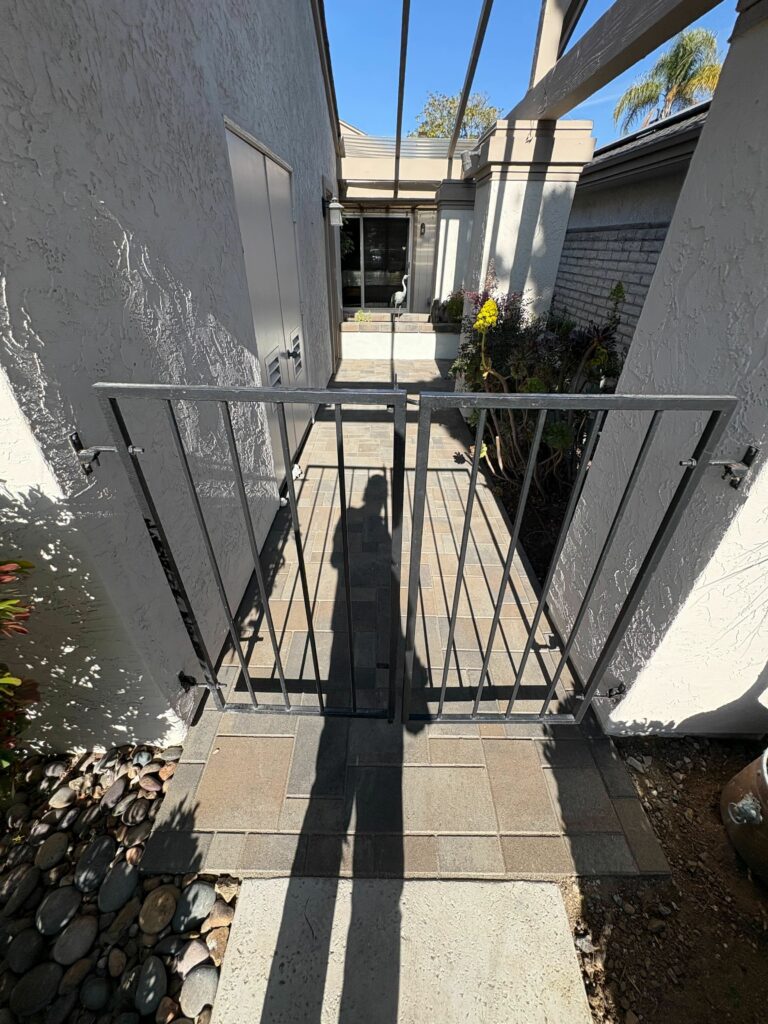
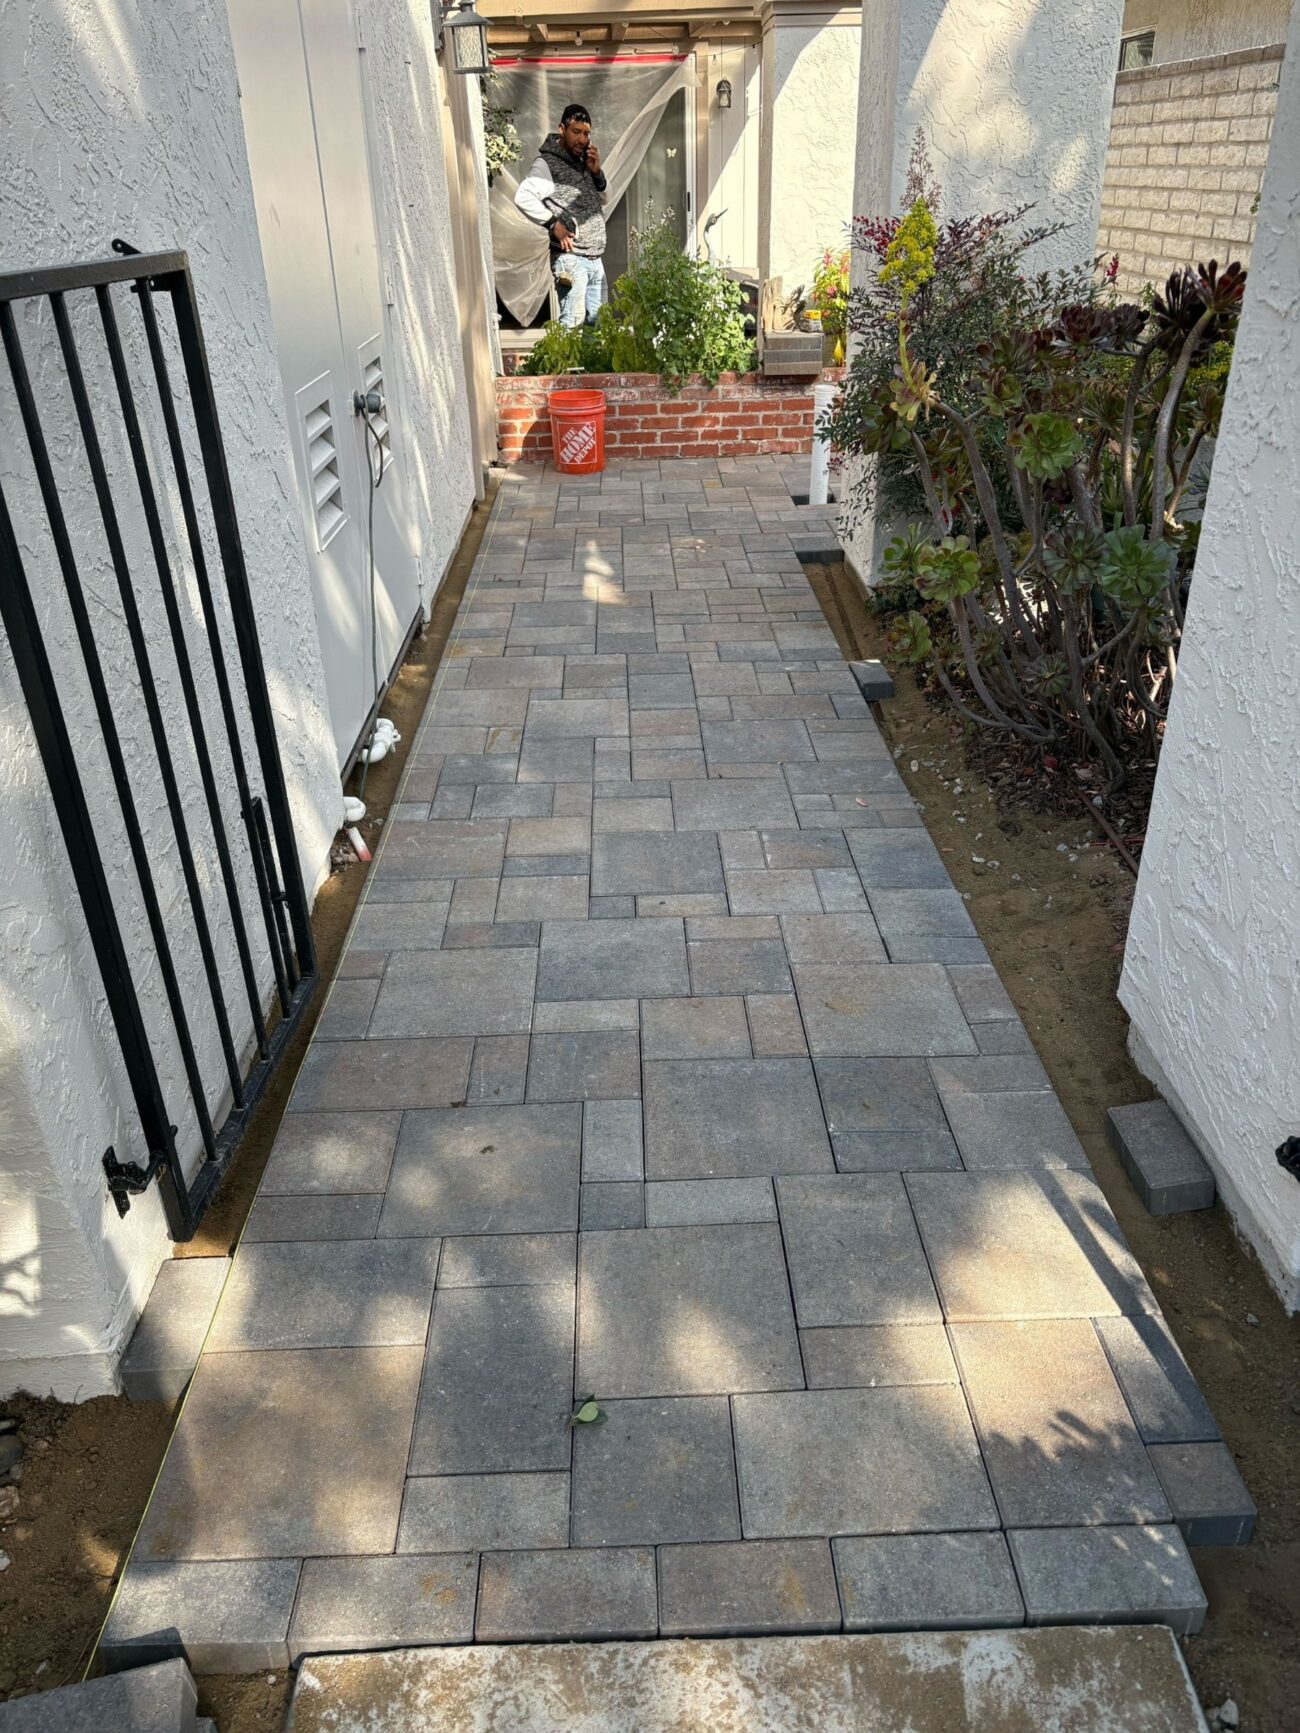
Walkway and stucco-capped planter wall. The cap finish matches the house exterior on purpose.
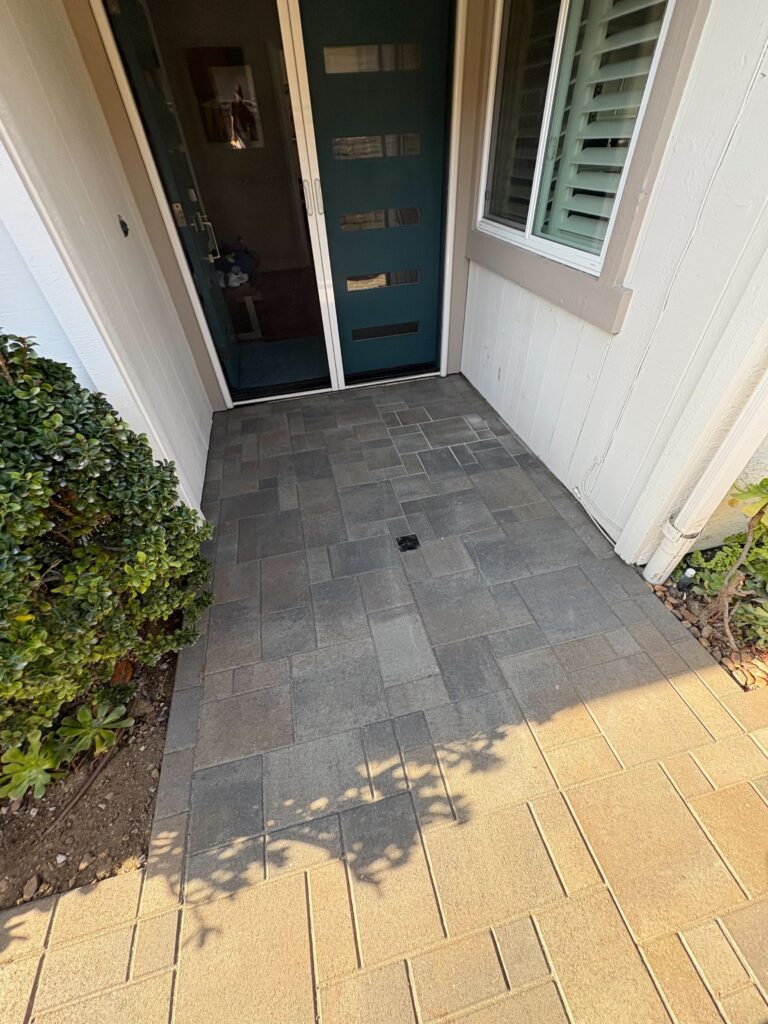
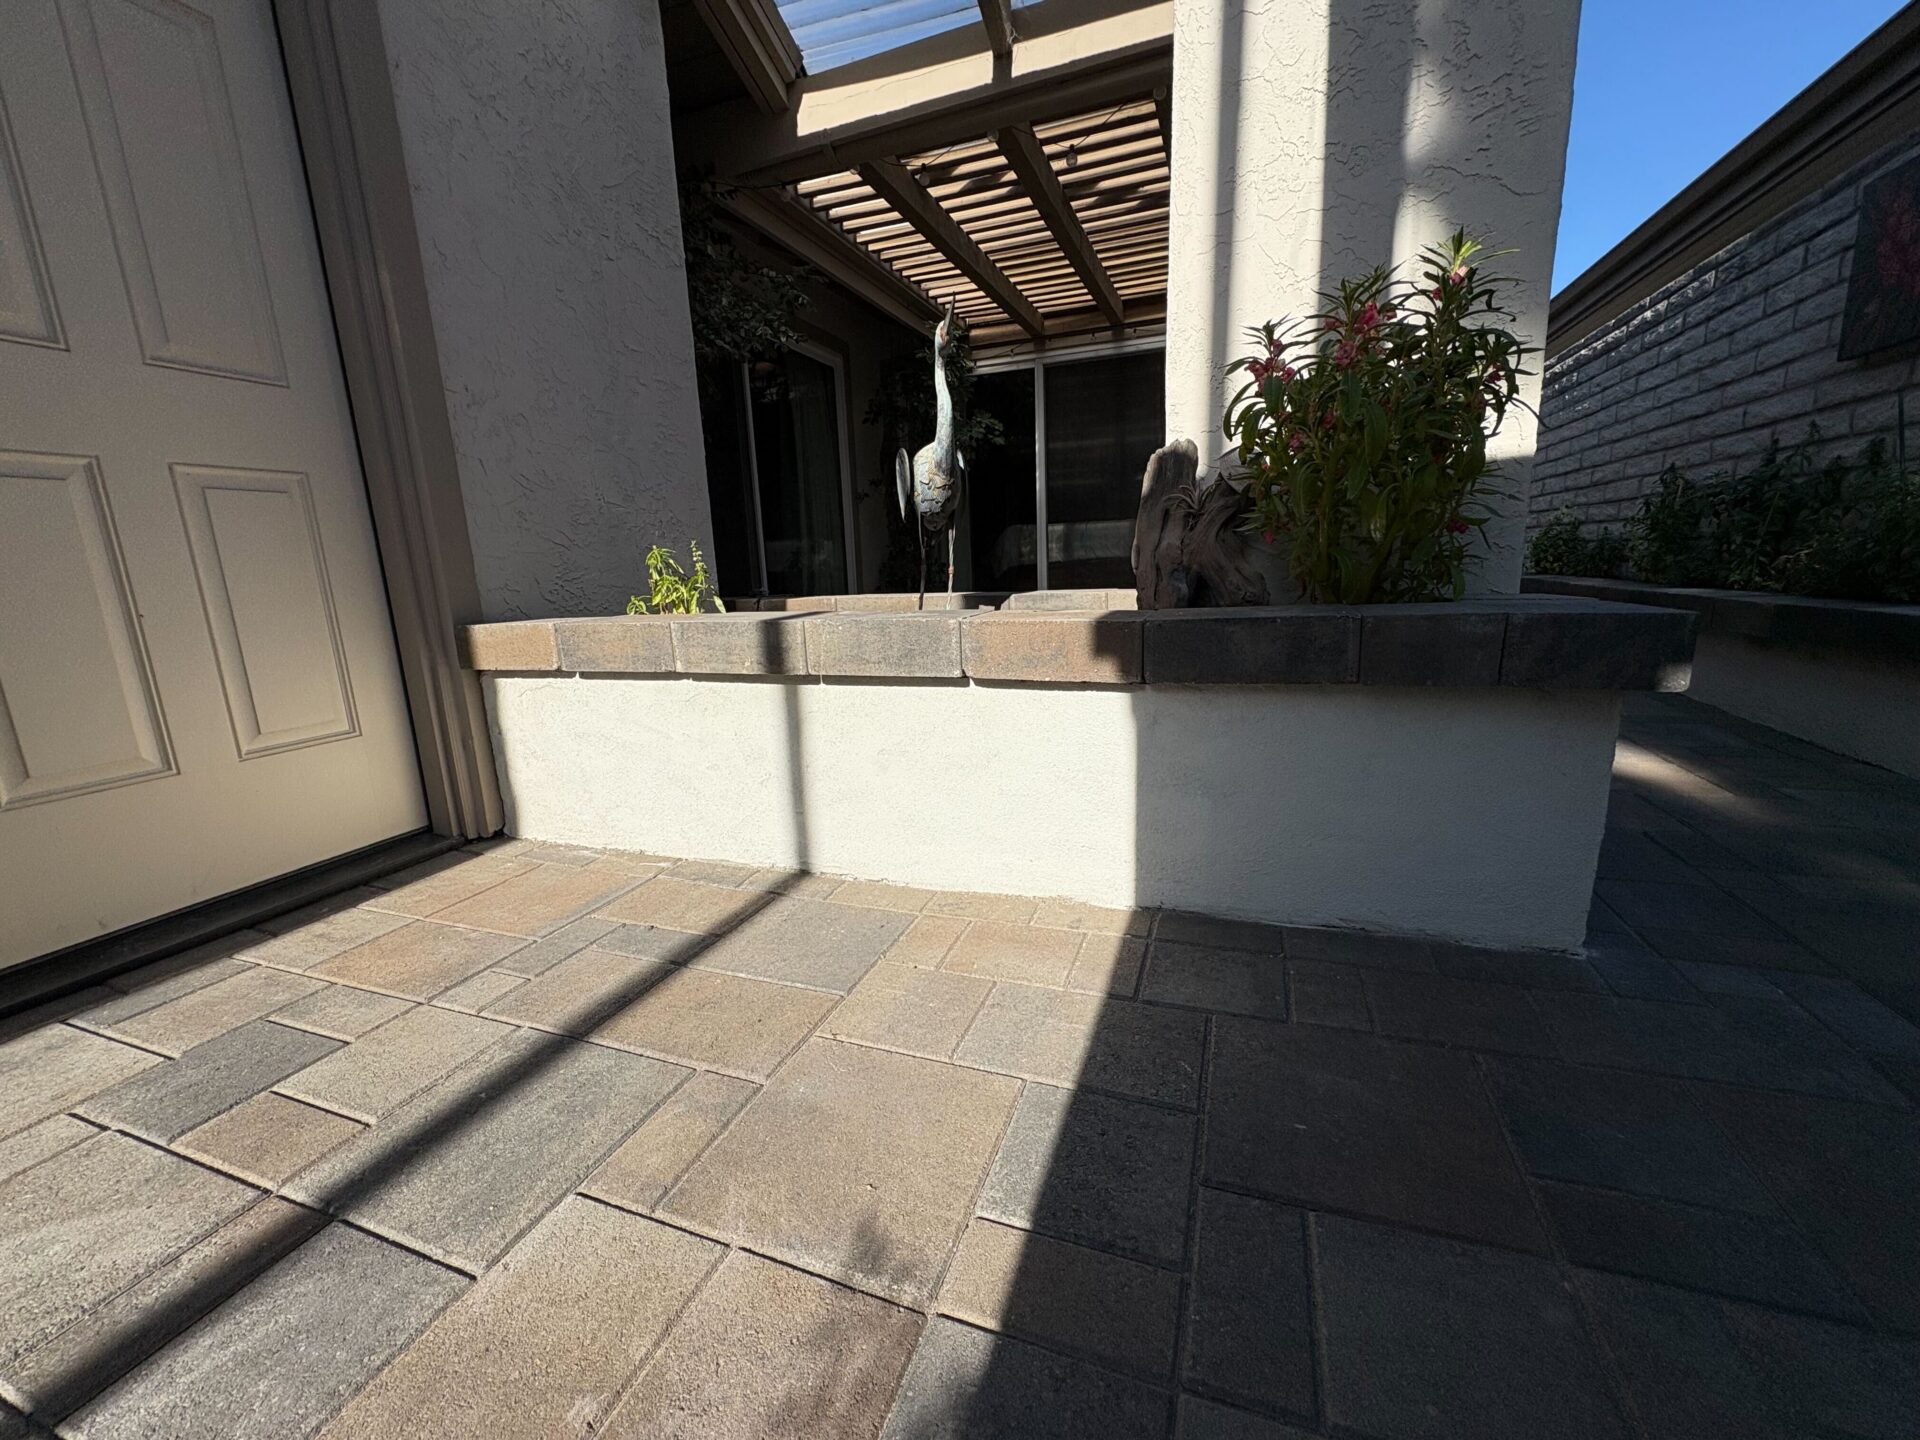
Front-entry landing with a flush recessed drain grate — the start of the paver run from the street.
Project Snapshot
Project Story
Overview
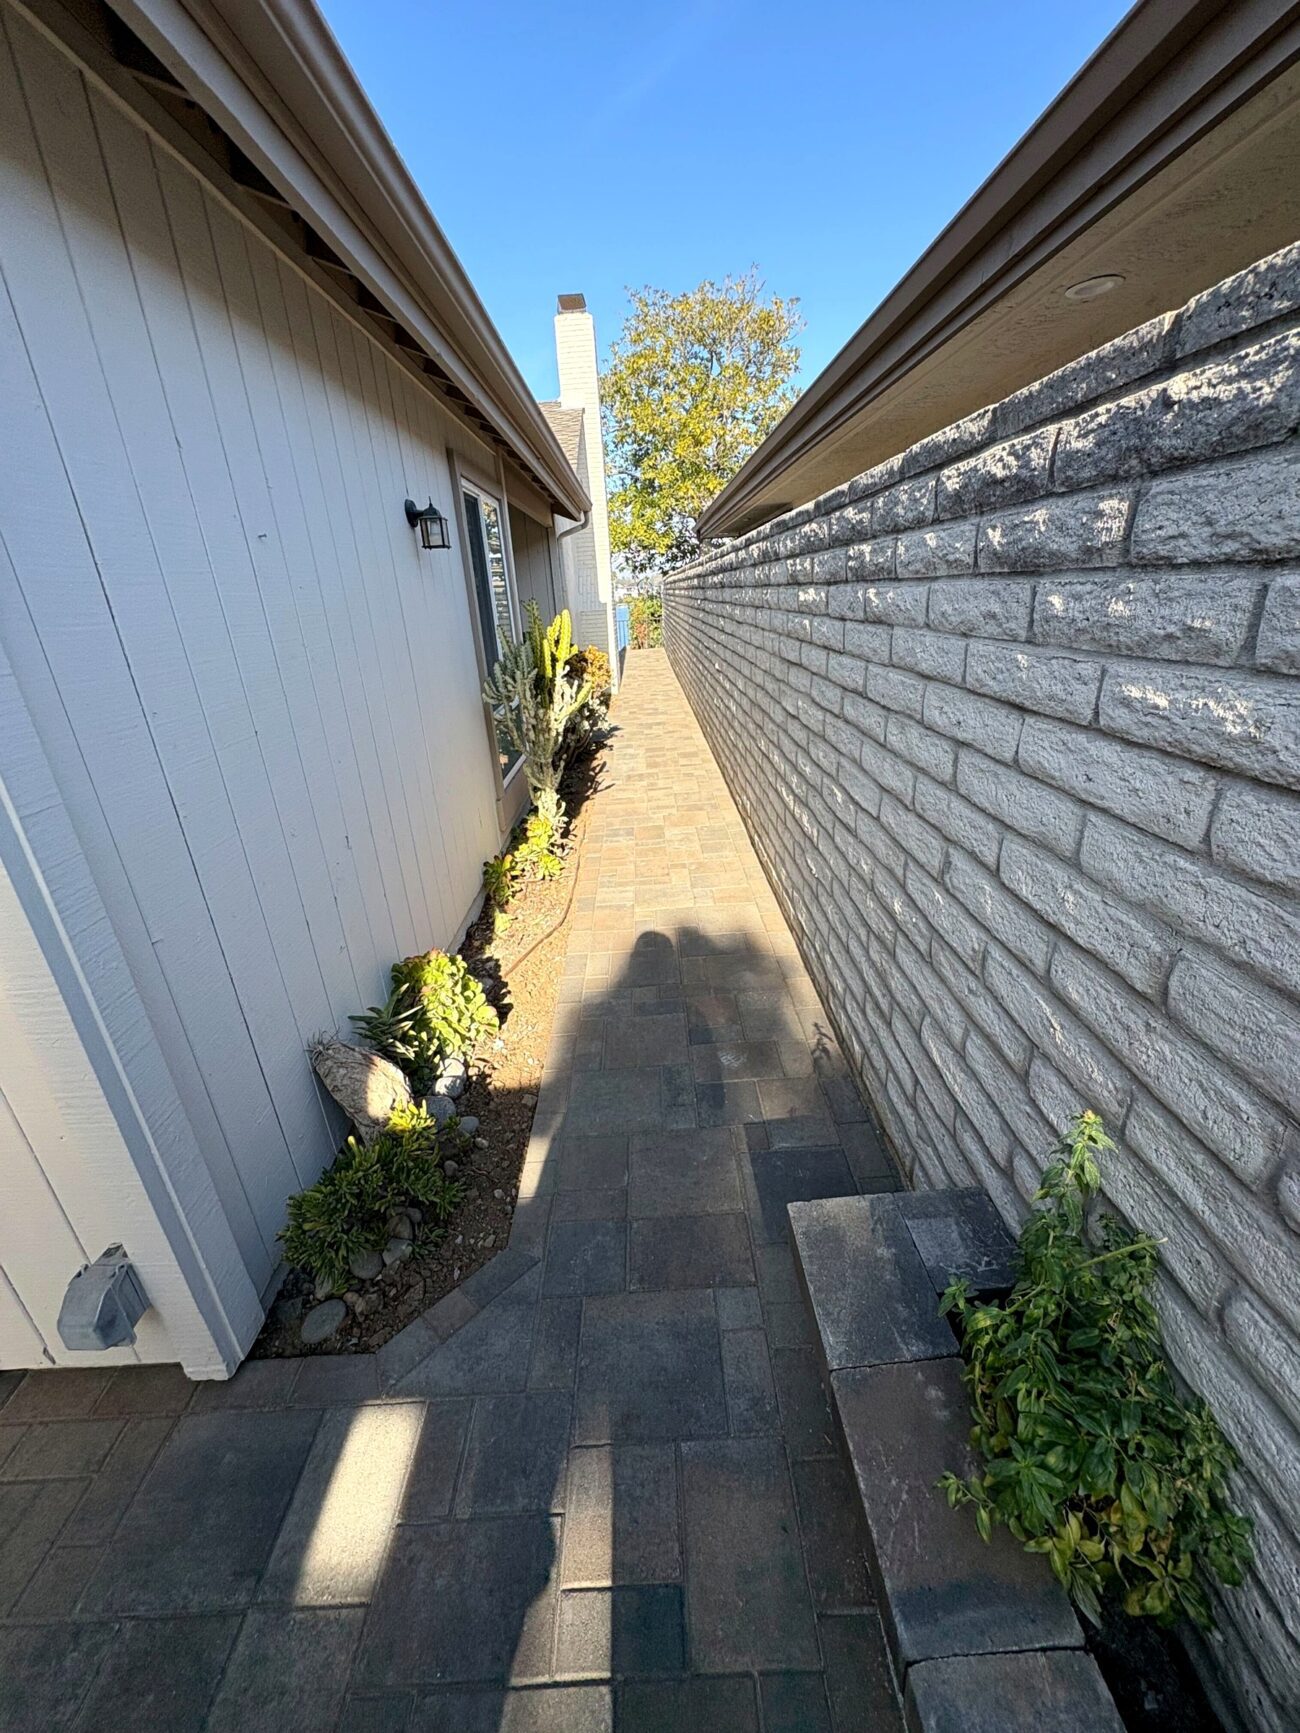
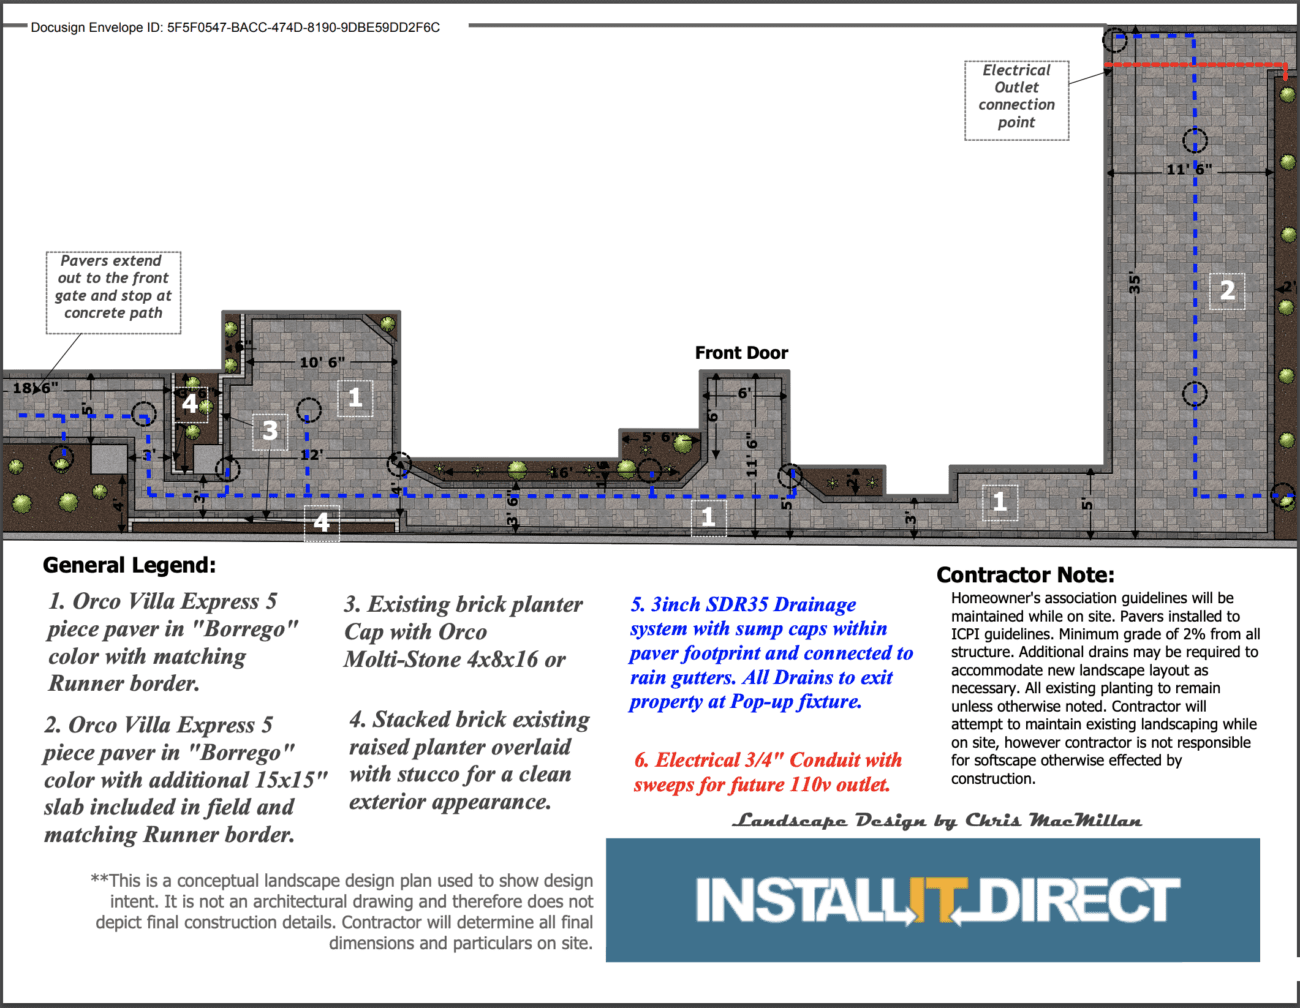
994 sf of ORCO Villa Express interlocking paver ran from the front entry through narrow side yards to the pergola-shaded rear patio. 78 lf SDR35 drain. Six Pro-Trade SL1 LED step lights. Nine working days on site, across roughly two calendar weeks.
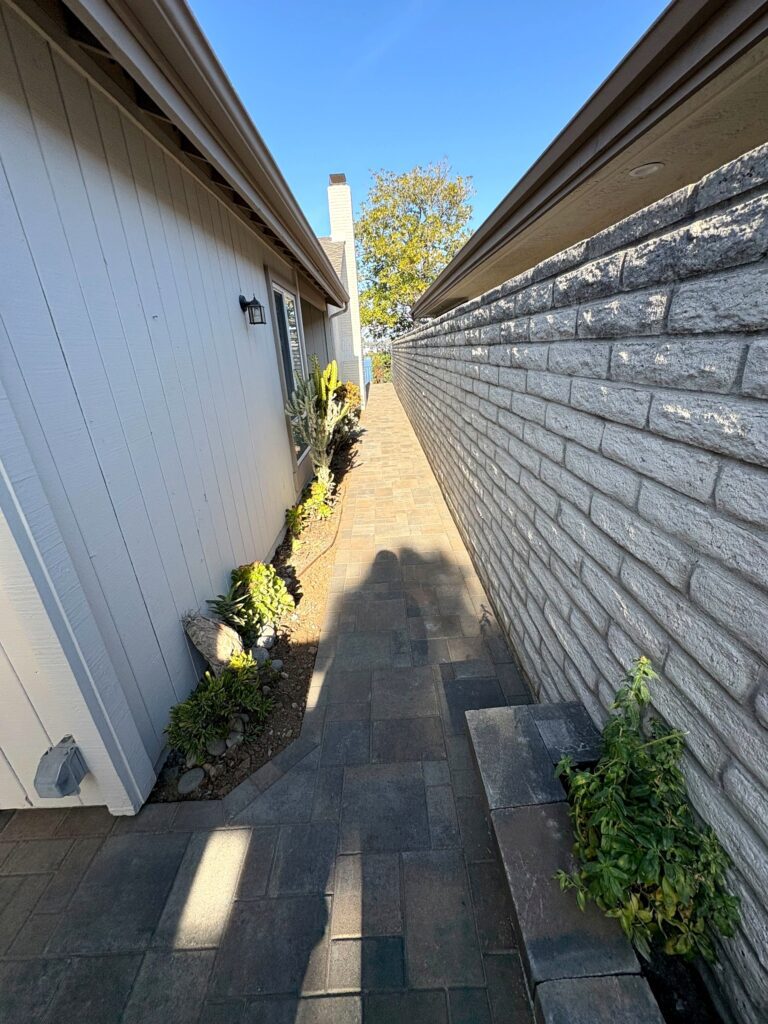
It's one paver from the front door all the way back to the pergola and that's what we wanted.
The Challenge
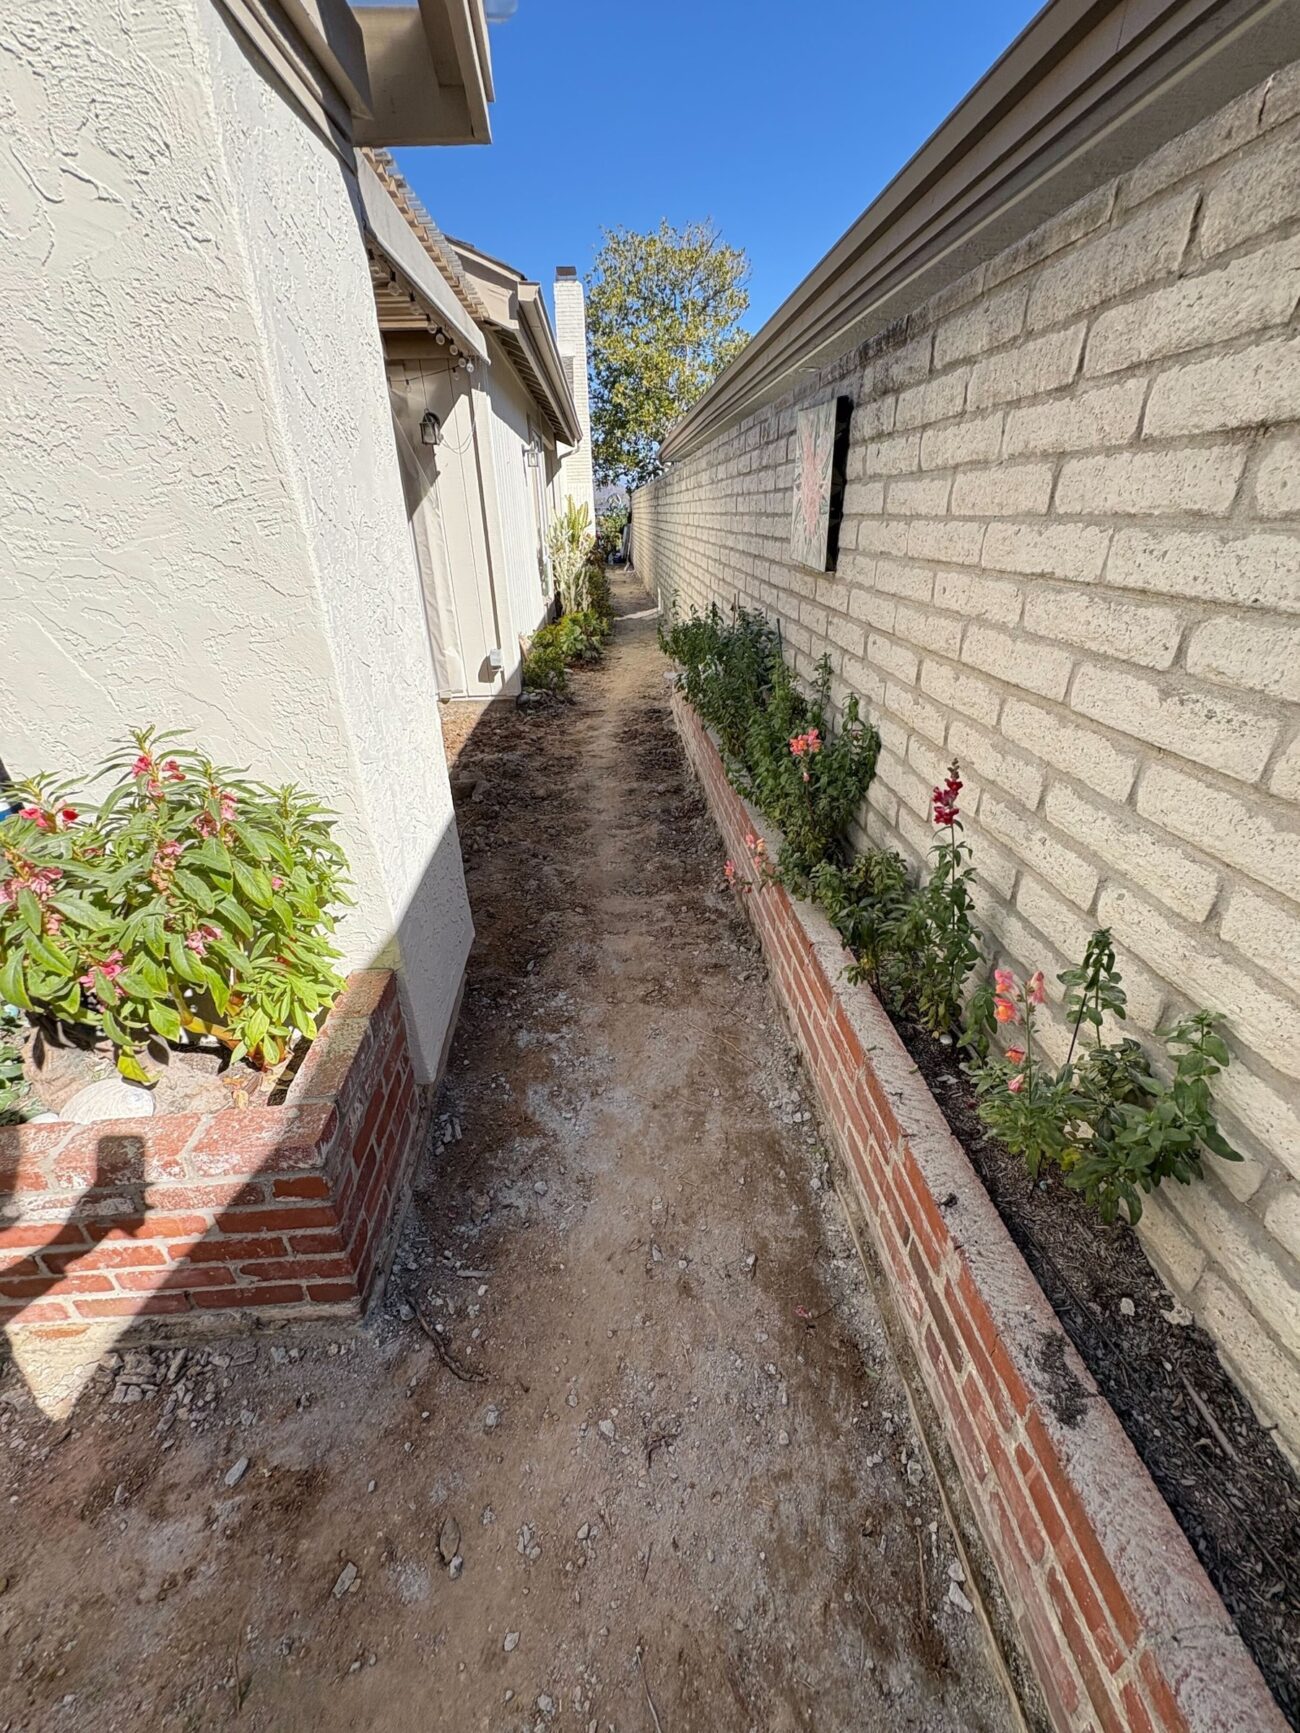
- Water pooled on the existing concrete patio and along the side yards after rain, with no drain system to move it away from the foundation.
- The concrete walkways were cracked and uneven, making the entry and side-yard path difficult and unappealing to use.
- The old brick and tile sections at the entry had settled unevenly, leaving gaps and trip hazards that the homeowner had worked around for years.
What Changed
How INSTALL-IT-DIRECT Helped
Over 1,000 five-star reviews and 1,500+ San Diego homeowners served.
Before & After
Design & Build
The Plan
ORCO Villa Express interlocking pavers selected for the full 994 sf, covering front entry landing, side-yard walkways, and rear patio under the pergola.
Raised planter walls finished with a stucco skim coat to match the home exterior, providing defined garden borders along the entry and patio perimeter.
78 lf of 3-inch SDR35 drainline with 9 square drain caps and 1 PVC pop-up emitter routed to carry surface water from the rear patio away from the foundation.
16 lf of electrical conduit run beneath the paver field to serve the low-voltage lighting system, keeping wiring protected.
Six Pro-Trade SL1 4.5-inch surface-mounted LED step lights placed at grade transitions, powered by a 150W Pro-Trade TR1 stainless steel transformer with a smart socket timer.
30 lf of sawcut to cleanly separate the existing concrete from the new paver zones before demolition began.
See the 2D plan drawing
The Build
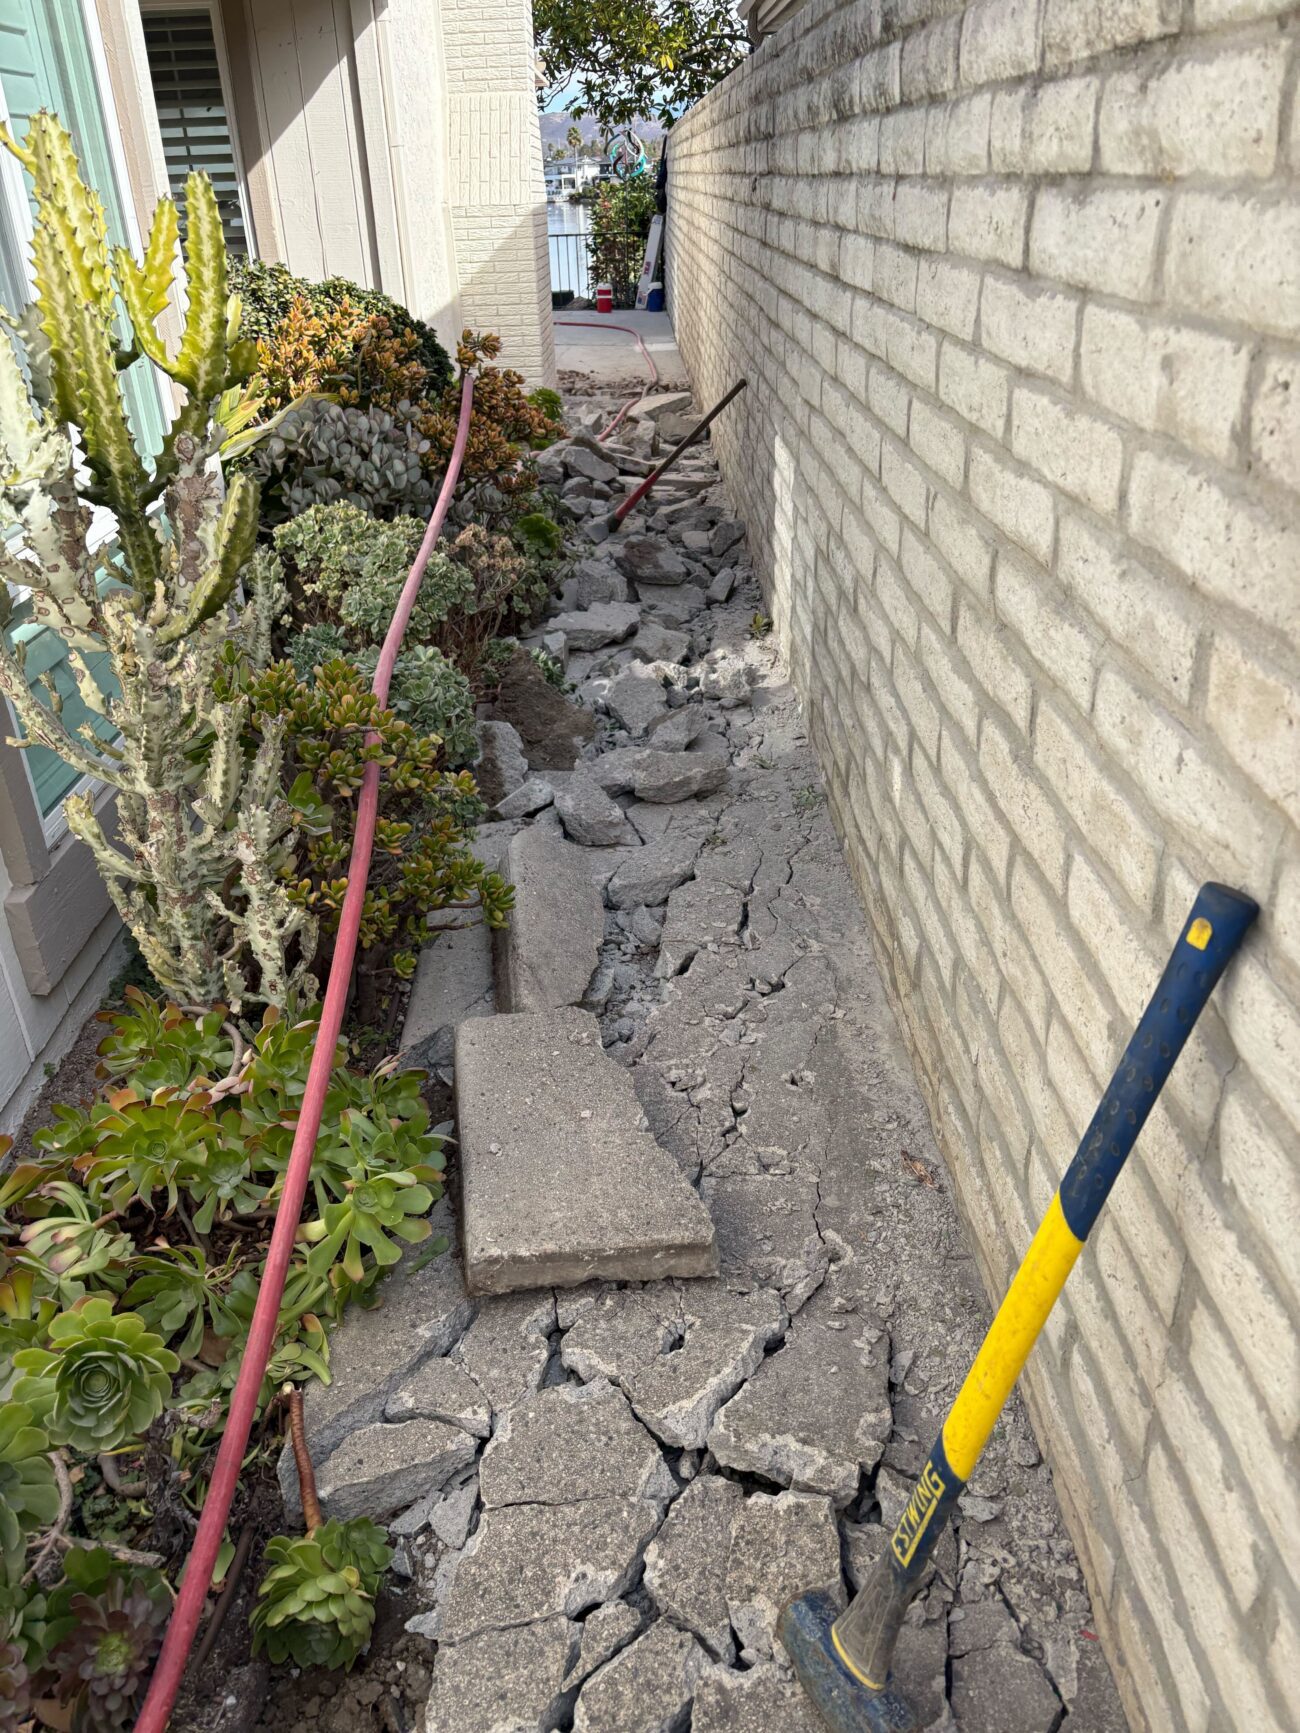
Demo and Haul-Off
The crew sawcut 30 lf of existing concrete at the transition lines, then demolished 800 sf of wire-mesh and rebar-reinforced concrete and 100 sf of brick and tile. Approximately 1.5 yards of soil were hauled off before drainage work began.
Drainage Installation
Immediately after demo, the crew trenched and installed 78 lf of 3-inch SDR35 drainline with 9 drain caps and a single PVC pop-up emitter. The project manager verified all drain locations and excavation depths on site before base prep began.
Base Preparation
Base material and sand were brought in. Excavation depths were verified with a tape measure at the paver edge and retaining wall face. A vibratory plate compactor was staged on site for subgrade compaction before bedding sand was screeded.
Paver Installation and Lighting
ORCO Villa Express pavers went down across all 994 sf, including the entry landing, side-yard corridors, and rear patio. Electrical conduit was set in the field before the paver layer was completed. Six Pro-Trade SL1 step lights were set at grade transitions and wired to the 150W transformer.
Walls, Stucco, and Polymeric Sand
Planter walls were built and received a fresh stucco skim coat. Polymeric sand was swept and set across the full paver field, and final sign-off followed shortly after.
Investment
What would a similar project cost in San Marcos?
Toggle components on/off to estimate your project
Frequently Asked Questions
How much does a paver patio installation cost in San Marcos?
A project like this one in Discovery Hills (92078) ran in the $22,500 to $25,000 range for 994 sf of interlocking pavers, reinforced concrete demo, a 78 lf drain system, planter walls, and six step lights. Simpler patio-only projects on flat, accessible lots will cost less. Access difficulty, existing concrete with rebar, and drainage add to the total.
Do I need a permit for a paver patio or retaining walls in San Marcos?
In the City of San Marcos, retaining walls taller than 3 feet (measured from the bottom of the footing to the top of the wall) generally require a building permit, and paver patios on their own typically do not. This project included planter walls; if any section exceeded the 3-foot threshold, a permit would have been required. Always confirm current thresholds with your local building department before starting. Verify current requirements with a licensed contractor or your local permit office.
Why is drainage important for a paver patio near the house?
Good drainage keeps surface water off the foundation. On this project, a 78 lf SDR35 drain system with nine drain caps and a pop-up emitter was installed under the patio before the first paver went down. Without it, water pools against the slab edge and can work into the foundation over time.
Do interlocking pavers require much maintenance?
Interlocking concrete pavers need very little upkeep. Occasional sweeping and re-sanding of joints every few years keeps them stable. The polymeric sand used here hardens to resist washout. If a paver is ever damaged, individual pieces can be lifted and replaced without disturbing the rest of the field.
How long does a 994 sf paver patio and walkway project take?
About nine working days on site, spread across roughly two calendar weeks. Scope here included demo of 800 sf of reinforced concrete and 100 sf of brick and tile, drainage trenching, base prep, paver installation across three zones, stucco wall finish, and low-voltage lighting.
Can step lights be installed in a paver patio?
Yes. On this project, six Pro-Trade SL1 LED step lights were set at grade transitions and wired through 16 lf of conduit run beneath the paver field. A 150W transformer with a smart timer controls the system automatically, so the path lights turn on at dusk without a wall switch.
Your Outdoor Project in 3 Simple Steps
Design
We listen to your vision, assess your space, and create a custom design that fits your lifestyle and budget.
Build
Our experienced crews bring the design to life with premium materials and expert craftsmanship.
Enjoy
Step into your transformed outdoor space and start making memories with family and friends.
Your Project Manager

Troy MacMillan
A San Diego native with more than 20 years in landscape construction, Troy brings seasoned craftsmanship to every build. A devoted husband and father of two, he carries the same care from the job site to his weekend farm.
More Projects
More from Troy MacMillan
Oceanside Paver Driveway, Turf Grid, and Front Entry Remodel
Oceanside
Mixed Angelus Pavers with Stone Pillars in Vista
Vista
Paver-and-Turf Grid Backyard in Vista
Vista
A 20-Foot Outdoor Kitchen Under a Pergola
Carlsbad
Evergreen Front and Back Yards, San Marcos Highlands
San Marcos
Cracked Concrete Out, Pavers In - Allied Gardens
San Diego
Ready to Transform Your Outdoor Space?
Let's discuss your project and bring your vision to life.